First Course Of Bevel Siding

Bevel Siding Bevel Siding Prices Patterns Pictures

Wood Siding How To Part A Installing Bevel Siding Old House Web

All About Rainscreens House Cladding Installing Siding Rustic Basement

Installing Western Red Cedar Bevel Siding Real Cedar
Exterior Bevel Siding Library Builder

How To Buy Wood Board Siding Wood Siding House Wood Siding Exterior Wood Sideboard
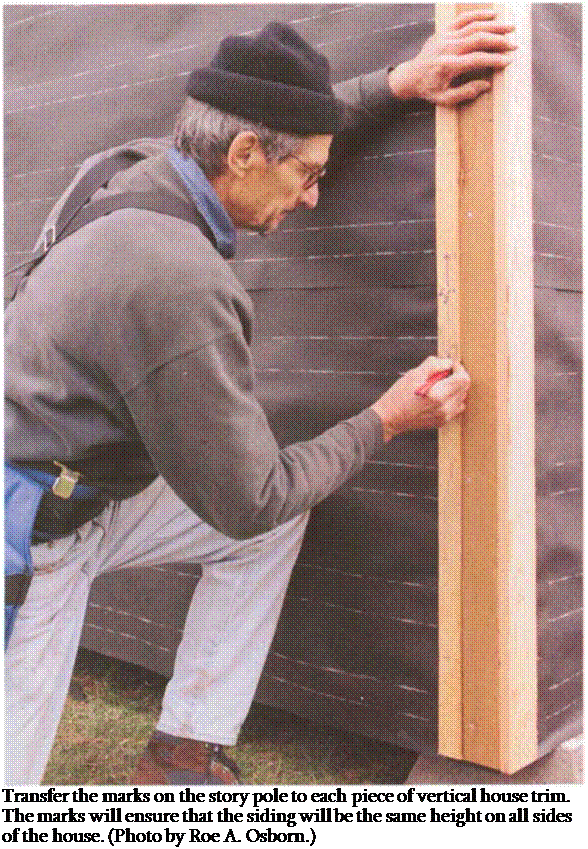
If more than one clapboard is needed to span a wall snap a chalk line between the marks on the corner boards on top of the course being overlapped.
First course of bevel siding.

Do It Yourself Cedar Siding Extreme How To

Cedar Bevel Siding Western Red Cedar Shiplap Knotty Gorgeous Cedar Siding Cedar Siding Maintenance Cedar Siding Repair
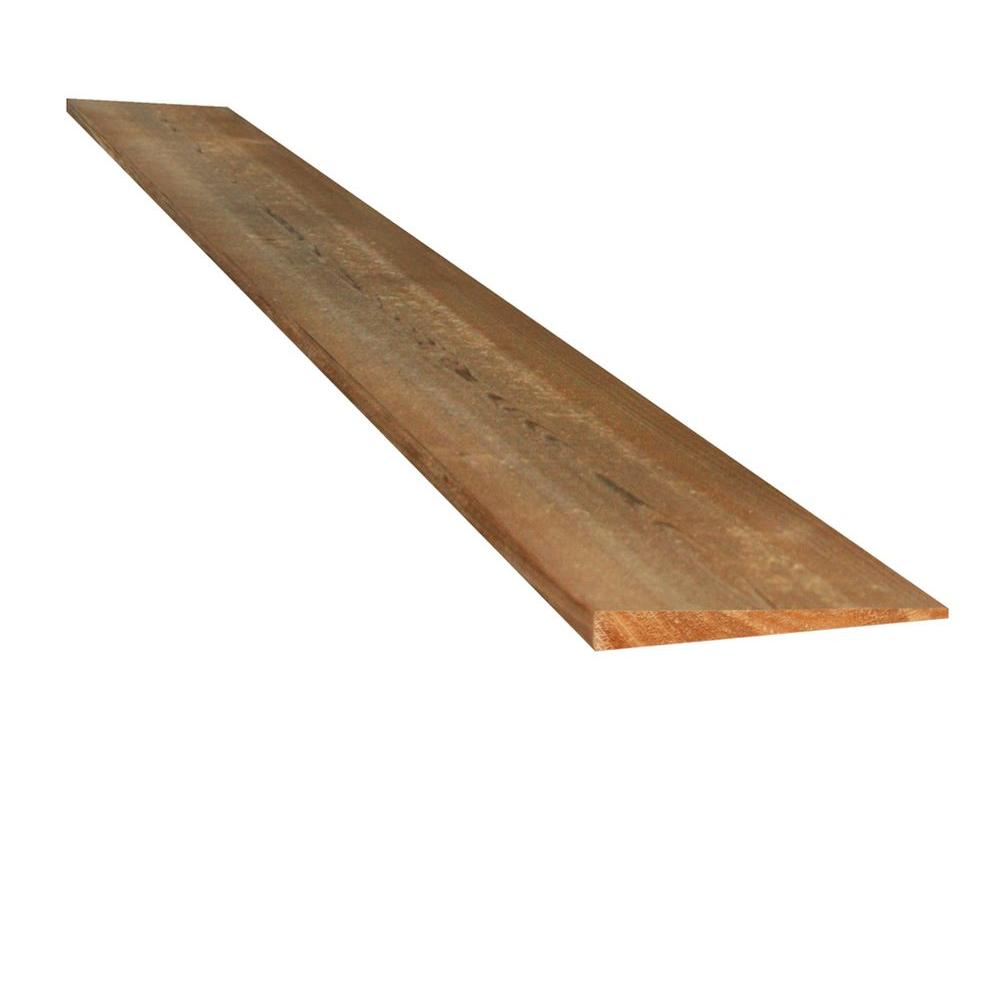
5 8 In X 6 In X 8 Ft Green Western Red Cedar Bevel Siding 0513228 The Home Depot

Wavy Edge Cedar And Steel Siding Google Search Steel Siding Cedar Siding House Siding

Pin By Distinguished Boards And Beams On Home Rustic Lap Siding Installing Siding Installing Wood Siding

Preparing Installing Cedar Columbia Cedar Inc

How To Install Cypress Bevel Siding Wood Siding Exterior Installing Wood Siding Wood Siding

Board Batten Wood Siding Simple And Inexpensive Options Board Batten Wood Siding Simple And Inexpensive Op Wood Siding Options Wood Siding Wood Siding Types

1x10 Bevel Siding No Rabbet Profile Clear Cedar 3 Coat Factory Finish Home In New York Siding Prices Clapboard Siding Cedar Siding

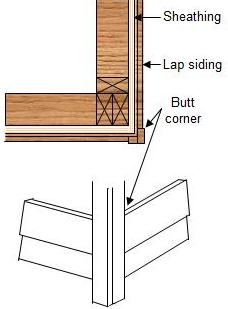
Correct Nailing Of Lap Siding Clapboard Siding Exterior House Siding Lap Siding

Exterior Siding Western Red Cedar Clear Stain Bevel Exterior Siding Exterior Siding Options Cedar Siding

Pin Van Jacquelyn Pratt Op House Houten Gevelbekleding Gevelbekleding Tuinhuizen

Pin On For The Home

Siding Patterns Wood Siding Pattern Diagrams And Pictures

Decorating With Shutters House Siding Options House Exterior Colonial Style Homes

Bevel Siding Affordable Bevel Siding Prices Bevel Siding Pictures Siding Prices Cedar Siding Cedar Clapboard Siding

Janss Lumber Siding Cedar Siding Exterior Siding Siding

Wood Siding A Visual Guide To Siding Options Colonial House House Exterior Home Additions
Https Encrypted Tbn0 Gstatic Com Images Q Tbn 3aand9gcqh0c3mje4z4eyiptkjgosjqillmuzod10q7uvy4uho6f0dyytu Usqp Cau

Wavy Edge Bevel Siding Pattern Sample Pattern Pictures Cedar Siding Siding

What Angle Do You Set Your Saw To Cut Corners On Bevel Cedar Siding Windows Siding And Doors Contractor Talk
In The 1960s Was The Siding On American Homes Made Out From Vinyl Or From Something Else Quora

Soffit House Exterior Framing Construction Exterior Remodel
How To Install Wood Lap Clapboard Or Beveled Siding Part 3
Source : pinterest.com
